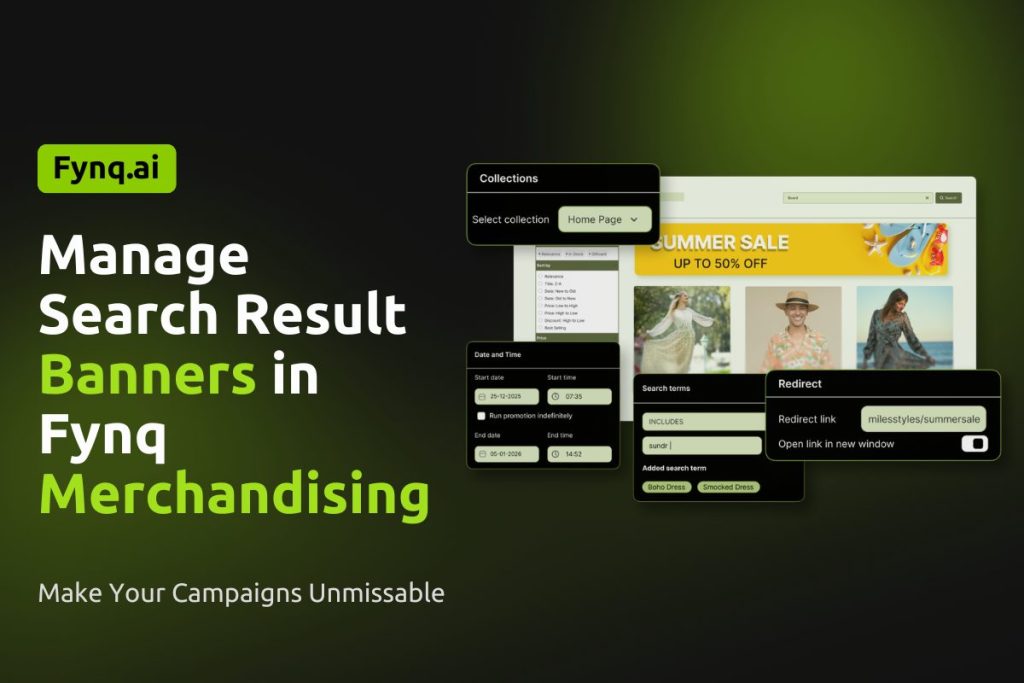
How to Manage Merchandising Banners for Fynq’s Search Result Page
Merchandising Banners are available only for stores on the Standard2K plan or above. The only merchandising strategy available to stores with Free and Basic (all three tiers) is Product Labels.
Search Banners bring visual communication into search results. While products answer what shoppers are looking for, banners explain why they should care. They help you set context, highlight campaigns, and influence decisions even before a shopper starts comparing products.
This strategy works best when messaging, emotion, or timing plays a key role in conversion.
When Search Banners Create the Most Impact
Search Banners are most effective at the top of the search journey. They appear immediately when a shopper searches, helping you guide attention and shape expectations early.
Merchants commonly use banners to:
- Promote sales, offers, or campaigns
- Highlight collections or new arrivals
- Reinforce seasonal or thematic messaging
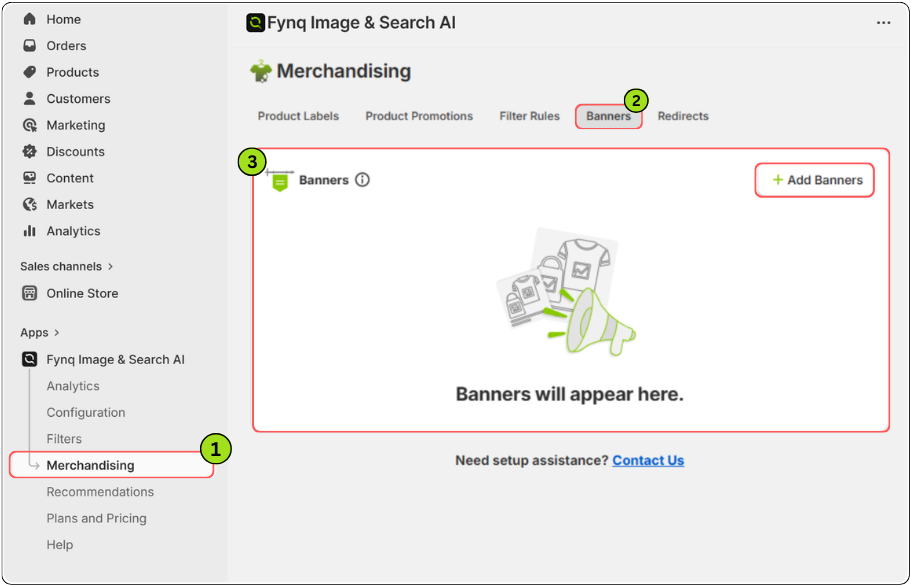
Where to Find the Merchandising Banner in Fynq App?
The Merchandising section in the Fynq app is where you manage all search-based promotions and controls. Each merchandising strategy has its own dedicated tab, making it easy to set up and manage independently.
To access Merchandising in the Fynq app:
- Open the Fynq app
- Go to Merchandising from the left side menu
- Now, choose the tab: Banners
- Click +Add Banners to proceed.
Before You Start
Each Search Banner:
- Runs based on UTC date and time
- Can be created for ANY, EXACT, or INCLUDES search terms
- Supports up to 5 responsive banner images per merchandising campaign
- Allows a maximum of 20 active banners
- Uses banner weight to control priority for the same search term
If more than one banner uses ANY search term, the banner created first will appear.
Step-by-Step: How to Set Up a Search Banner
Step 1: Add a Banner Name
Enter a clear Banner name. This is for internal reference and helps you manage banners across campaigns, seasons, or collections.
Step 2: Set Banner Weight
Assign a weight to the banner. This controls which banner appears first when multiple banners match the same search term.
Higher weight means higher priority.
Step 3: Upload Banner Images
Upload your banner images. The height must remain 90px, while widths vary based on screen size. You can upload up to five images to ensure responsiveness across devices.
Recommended sizes:
- 275px × 90px for screens above 0px (Best for mobile devices)
- 440px × 90px for screens above 495px
- 654px × 90px for screens above 750px
- 980px × 90px for screens above 1024px
- 1280px × 90px for screens above 1320px (Best for desktop view)
Uploading all five versions ensures the best visual experience. Here’s a good example:
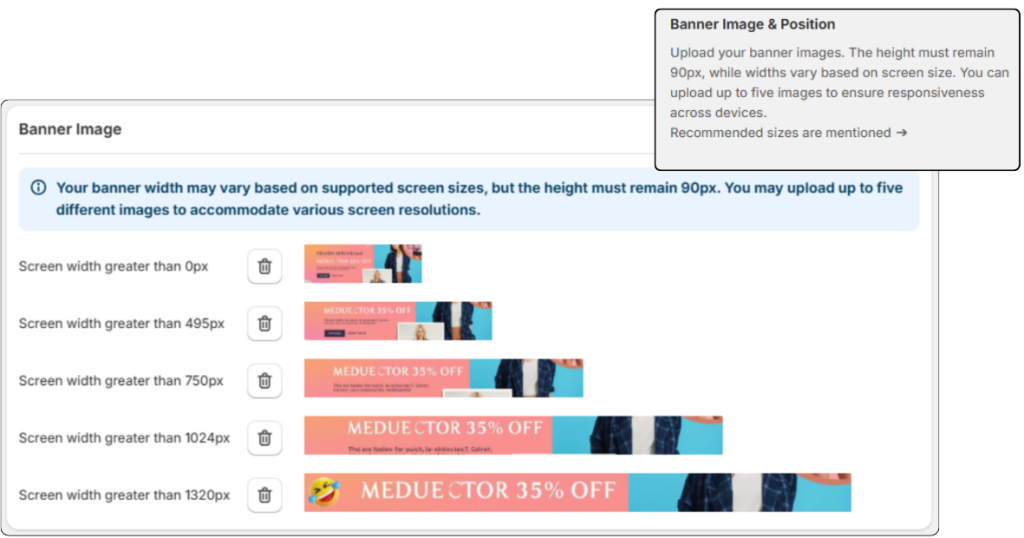
Please Note:
If most of your users use mobile, upload the first size along with others. Size 275px X 90px goes best for mobile. Without uploading banners of this size, the banner feature may not show on most mobile devices.
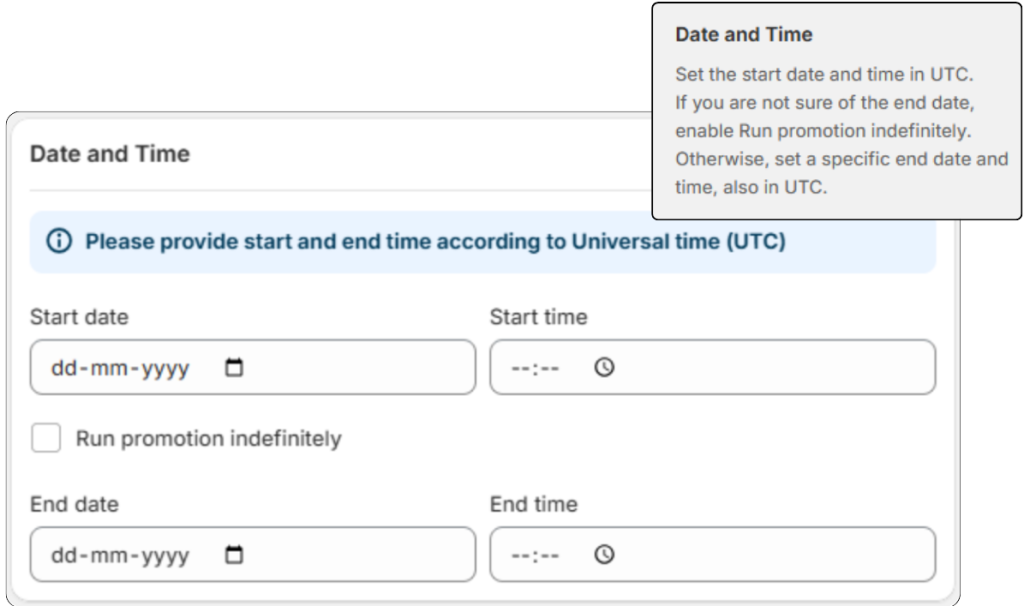
Step 4: Set the Banner Schedule
Set the start date and time in UTC.
If you do not know when the banner should end, enable Run promotion indefinitely.
Otherwise, define an end date and time, also in UTC.
Step 5: Define Search Terms
Choose how the banner should appear in search:
- ANY
The banner appears on all search result pages. - EXACT
The banner appears only for the exact search term.
Example: “summer sale” triggers the banner, but “big summer sale” does not. - INCLUDES
The banner appears when the search term contains your keyword.
Example: Searching “summer dresses” triggers a banner for “summer”.
Step 6: Select Collection (Optional)
Choose a collection name if you want the banner to appear only when that collection is active.
Keep ‘Please select’ if you do not want to restrict the banner to any collection.
Step 7: Add a Redirect Link (Optional)
If you want shoppers to land on a specific page (like a collection or product page) when they click the banner, add a Redirect link.
You may also enable the option to open the link in a new window.
Step 8: Save the Banner
Save the banner. It will appear automatically based on the schedule, search terms, and conditions you defined.
Know a Few Practical Use Cases
Turning Search into a Campaign Touchpoint
Suppose you are running a seasonal sale. Shoppers search for everyday terms like “shirts” or “women tops,” but they may not know a sale is live.
By adding a Search Banner for those terms, you immediately communicate the offer. Shoppers see the message before scrolling. The sale feels intentional, not hidden. Engagement increases, and more shoppers explore discounted products.
Guide Your Shoppers During a New Launch
Suppose you launch a new collection. You want shoppers searching related products to notice it instantly.
You create a banner with strong visuals and link it to the collection page. When shoppers search, the banner introduces the collection before products appear. This builds curiosity and encourages exploration without disrupting the search flow.
The banner does not push. It invites.
Things to Keep in Mind
- Keep banner messaging clear and focused
- Avoid running too many banners for the same search terms
- Always align visuals with the page the banner redirects to
Learn Fynq’s other merchandising strategies:
Read More: ⏩ How to Use Product Promotions
Read More: ⏩ How Filter Rules Work
Read More: ⏩ How Redirect Rules Work
Read More: ⏩ What are Product Labels