How to Set Product Display Behavior in the Instant Search Widget
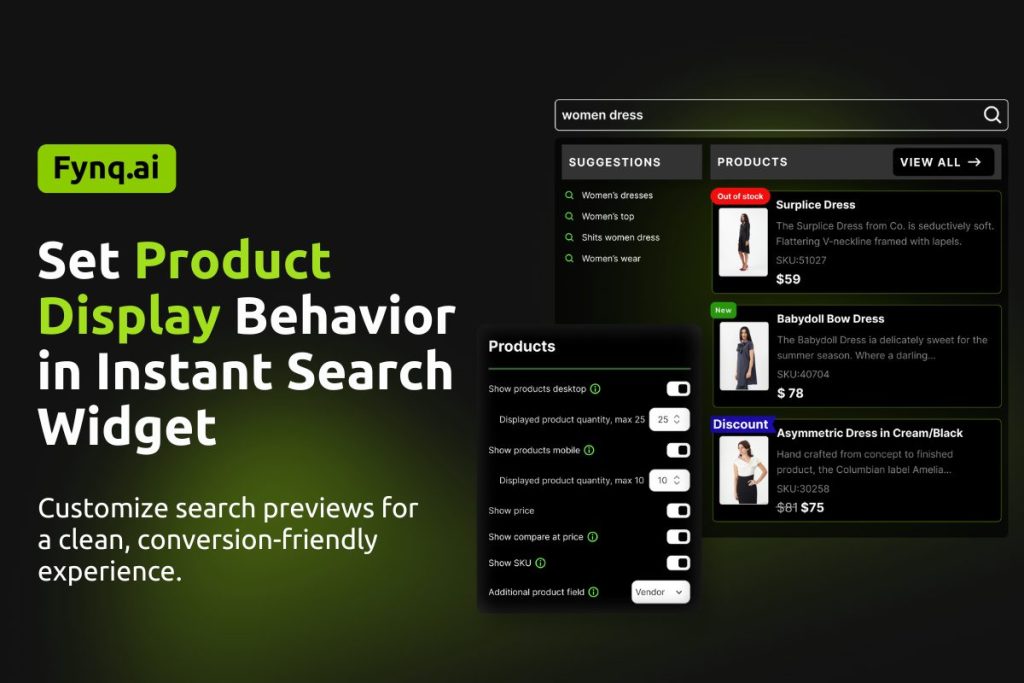
The Instant Search Widget is the first thing customers see when they type into your store’s search bar. It creates the first impression of your eCommerce store’s management. If it shows the right products with the right details, you are halfway in the conversion game.
And Fynq simplifies it more. You can decide how many products show up, whether prices and SKUs are displayed, and which extra product fields appear. These settings help keep your shoppers’ search experience clean, useful, and perfectly suited to your customers.
Let’s go through how to set this up, step by step.
Where To Find These Settings in Fynq
You can access all the Instant Search product display options in this way:
- Open the Fynq Image & Search AI app
- Go to Configuration
- Click on the Instant Search Widget tab
- Here you will find the 4th section titled Products
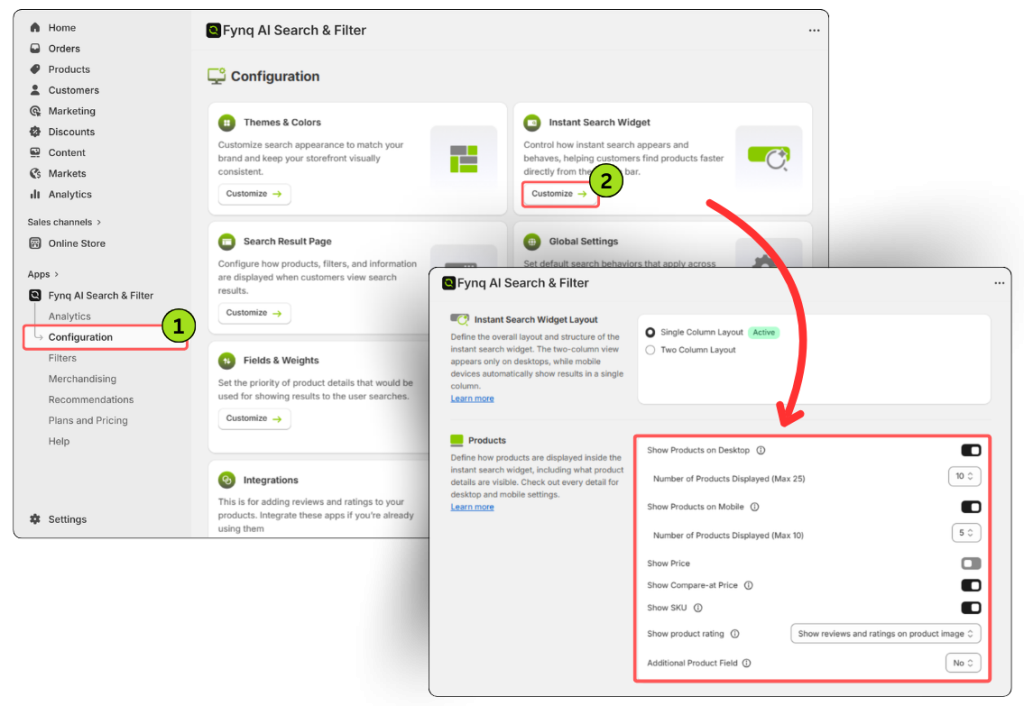
This is where you’ll manage how products appear in the Instant Search Widget, both on desktop and mobile.
ℹ️
All the Guides in this Article are ONLY for Instant Search Widget.
For Search Result Page settings, move to the next section: Search Results page Settings
1. Show Products on Desktop
This toggle lets you decide whether products should appear in the search widget when it’s opened on desktop.
- Turn this ON to show matching products right under the search bar.
- Below it, you’ll see a dropdown to choose how many products to display: from 1 to 25.
Tip: Don’t overload your customers. Even though 25 is the max, showing 8 to 12 products is usually a better experience. It keeps things quick, simple, and easy to scan.
2. Show Products on Mobile
Same idea, but for mobile users.
You can toggle it on to display matching products when someone types in the search bar on their phone.
- A dropdown lets you pick a number between 1 and 10.
Tip: Mobile screens are small. Showing 4 to 6 products is often ideal. Too many can feel crowded or hard to scroll through.
Note: Please check if the “Show Relevant Product Variant (in-stock)” is switched ON in the Global Settings (in Configuration itself) to show the most relevant products according to searches.
3. Show Price
When this toggle is turned on, each product result will also display its price. This gives customers instant clarity on what they’re looking at.
The demonstration below shows how this toggle works:
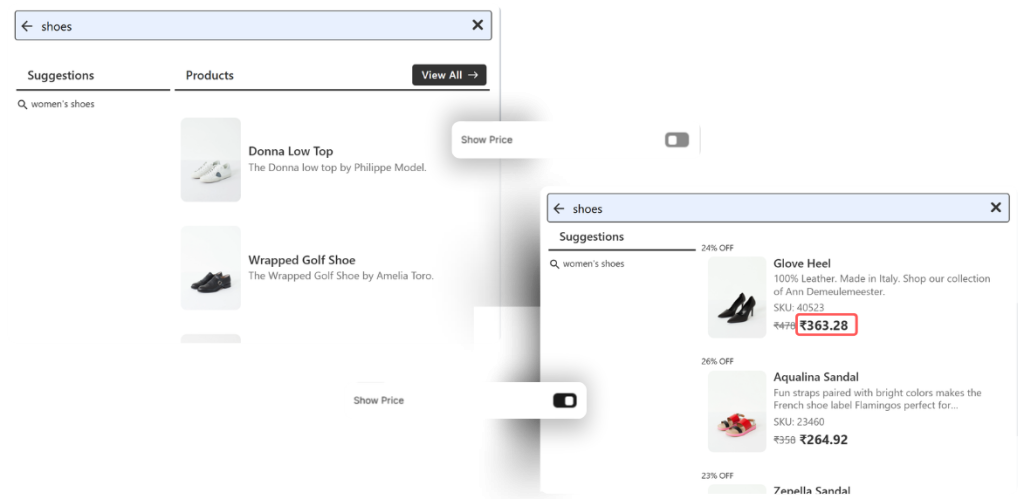
Tip: People shop faster when they can see the price up front. It removes guesswork and helps them compare options.
Note:
If you want to customize how prices appear (like showing the lowest price, first variant price, or a price range), go to Global Settings (in Configuration) > Products and Variants > Display Price Variant. You’ll find more detailed options there. (How to Choose the Right Price Display Format in Fynq)
4. Show Compare-at Price
This setting displays the original price along with the discounted price, if available. It helps highlight the savings clearly.
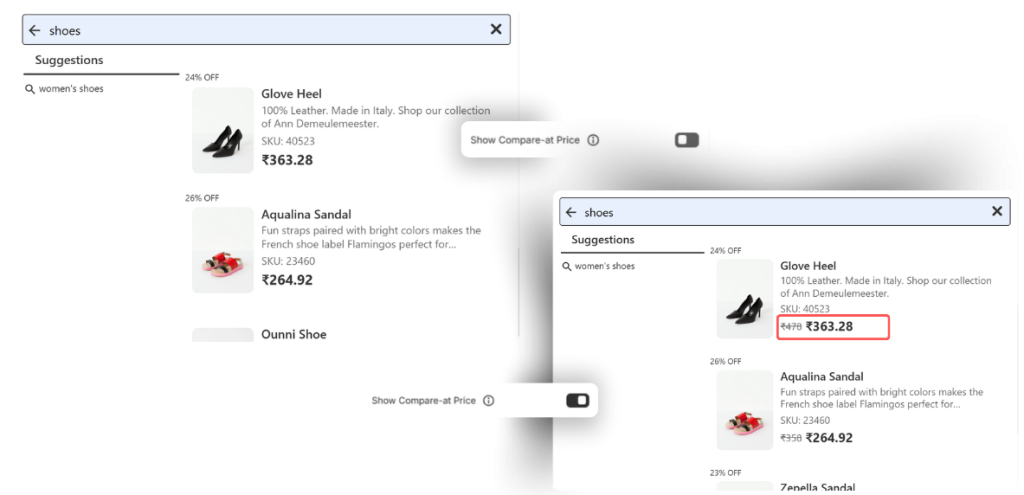
Tip: This works great during sales or promotions. Seeing the price drop visually can nudge a customer to click or buy right away.
5. Show SKU
Turning this on will add the product SKU (Stock Keeping Unit) to the product display in search results.
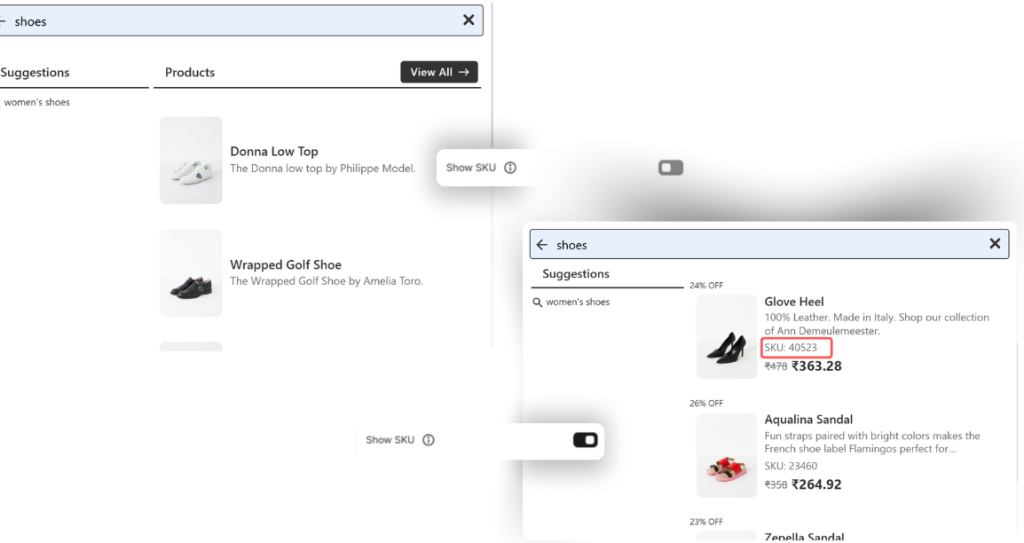
Tip: This is especially helpful for wholesale stores or merchants with large inventory. It lets both you and your customers identify products quickly and accurately and track those products later.
6. Additional Product Field
This dropdown lets you add one extra piece of product information to appear in the search results, like the brand, product type, or collection. This will show in the product card.
Here are your options:
- No – keeps it clean and minimal
- SKU for all variants – useful for inventory-heavy stores
- Vendor – helpful if you sell items from multiple brands
- Type – show the product category
- Collections – show which collection the product belongs to
Tip: If you sell multiple brands or categories, showing the vendor or type can help shoppers understand what they’re clicking without needing to open a new page.
Wrap-up
The Instant Search Widget is all about first impressions. With Fynq’s display settings, you can control what shoppers see as they type, and make sure it’s the right mix of clean, helpful, and sales-ready.
Spend a few minutes here and test different settings. A smoother search experience often leads to faster clicks and higher conversions.