How to Manage All Filters in One Place with Fynq?
As your store grows, so does your list of filters. Some come from product options like size or color. Others might be built using tags or metafields. It can get hard to keep track of which filters are active, what they look like, and how they behave across your storefront.
That’s where the Filter Table in Fynq comes in. It’s a single dashboard where you can view, edit, and manage every active filter in your store. It gives you a clear view of how your filters are organized, and makes cleanup or updates quick and easy.
Where To Find the Filter Table in Fynq
To access your full filter list:
- Open the Fynq Image & Search AI app
- Go to Filters
- You’ll land on the tab: Filter List
- Scroll down to the section labeled Filter Table
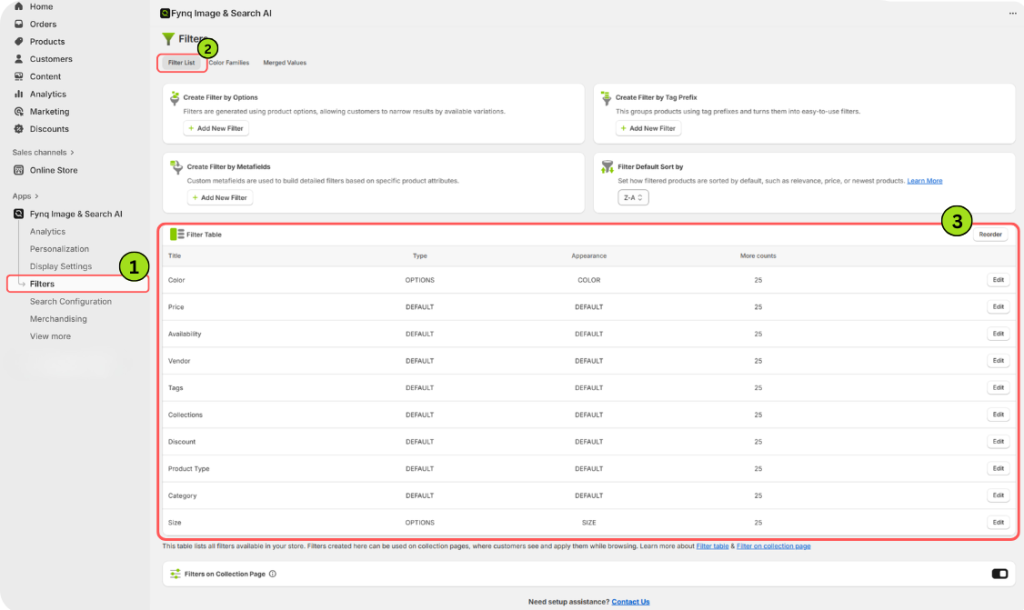
You’ll now see a table with every filter you’ve created, along with their key details.
Understand Each Element of The Filter Table
Each row in the table represents one filter. Here’s what each column tells you, and how you can use it:
1. Title (of the filters)
This is the name of the filter as it appears on your storefront, like “Size,” “Color,” or “Fabric Type.”
It helps you spot filters at a glance, especially in a long list.
2. Type
This column tells you what kind of data powers the filter. It could be:
- Default – Built into Shopify or your theme
- Option-based – Created from product options (like sizes or colors)
- Tag Prefix – Built using structured tags like material_cotton
- Metafield-based – Connected to metafields from your Shopify admin
Learn how to set filters with the above parameters with our detailed guide: Creating Filters.
Tip: Knowing the type helps you understand where each filter pulls its data from, and how to fix it if the values ever stop appearing.
3. Appearance
This shows the visual style assigned to the filter. Options can include:
- Default – Standard dropdown
- Color – Swatches used for color filters
- Size – Grid-style layout for sizes
- Hidden – Not visible on the front end
You can use this to double-check which filters are customer-facing and which are hidden.
4. More Counts
This value tells you how many options will be shown before the “More” link appears.
For example, if set to 5, only 5 values will show, and users can expand the list to see more.
This keeps long filters like “Brands” or “Styles” tidy and scrollable.
5. Edit
On the far right of each row, you’ll see a button named ‘Edit’.
Click this button to open the full settings page for that filter. You can change the title, display rules, appearance, and more.
Tip: Use this any time you want to tweak how a filter behaves without starting from scratch.
Wrap-up
Managing filters doesn’t have to be messy. With the Filter Table in Fynq, you get a full view of every active filter in your store, organized by type, style, and function. It’s the easiest way to stay in control as your catalog grows and changes.
Take a few minutes to review your table, clean up unused filters, and make sure everything looks sharp. Clean filters lead to faster shopping, and faster shopping leads to more sales.