How to Install Fynq from the Shopify App Store
Once you make up your mind to uplift your store with the right search, discovery, and filter app, you need to install the Fynq app on your Shopify store. The good news is: installing Fynq is quick, safe, and doesn’t require any coding or technical setup.
If you’ve never installed an app from the Shopify App Store before, you don’t need to worry. This article will guide you through the full process, step by step, in your language. You’ll be up and running in just a few minutes.
Don’t worry. Fynq Search & Image AI is all Shopify-native. That means Fynq doesn’t break your theme or add unwanted code. It works with your store, not against it.
Table of Contents
Step-by-Step Guide to Install Fynq from the Shopify App Store
Follow the steps below to get Fynq installed and activated:
Step 1: Go to the Shopify App Store
You can directly download the app by clicking here
Otherwise, you can follow the default process stated below:
- Open your browser and go to: Shopify App Store
- In the search bar, type Fynq AI search & Filter (or just “Fynq”; it should show up in the results).
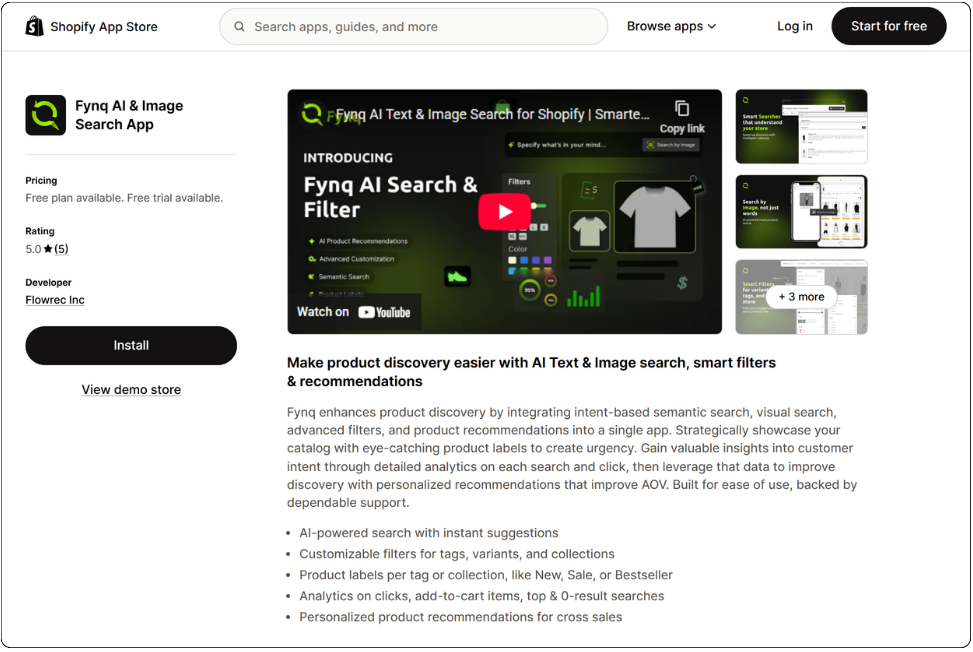
Step 2: Click “Install”
Once you find Fynq, click on it to open the app listing page. You’ll see details about the app, screenshots, and pricing plans.
- Click the Install button (usually on the left column of the page).
- This will redirect you to your Shopify Admin, where you’ll be asked to confirm the installation.
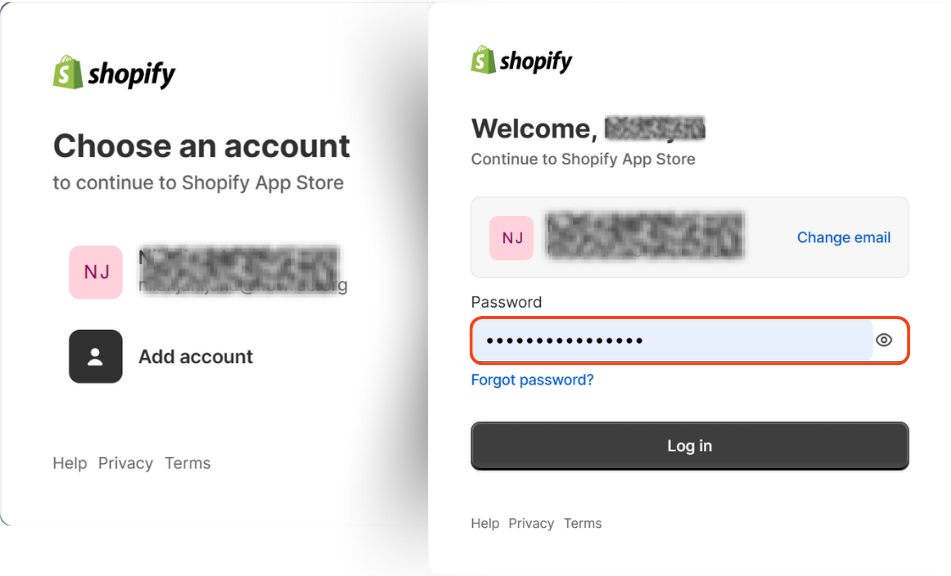
Step 3: Choose an Account to Continue
Shopify will prompt you to choose the account or store where you want to install the app.
- Select the correct store (especially if you manage more than one Shopify account).
- Make sure you’re logged into the correct admin profile for that store.
- Then you should input your store password.
- After putting in the password, click “Log in”.
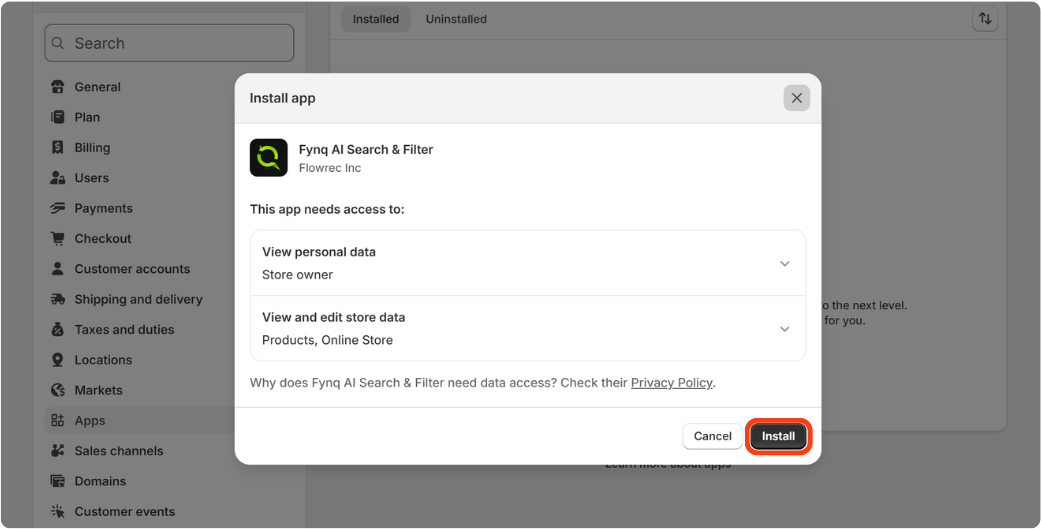
Step 3: Grant Permissions and ‘Install’
- Now, a page will appear on the Shopify admin site. Then you have to give permissions the app needs (like reading products, modifying themes, etc.). Or, by installing the app, you automatically give these permissions.
- Click Install to confirm.
Note: Fynq never changes your live theme. To match your store’s design, select the same theme (if available) for the search page as your active storefront theme.
Step 4: Pin Fynq on the Shopify Admin’s Left Panel
Once installed, you need to pin the app for easy access.
Follow these steps to Fynq Image & Search AI:
- Go to Shopify Admin
- Click on Apps (left panel)
- Now, a search bar will open at the top of the Shopify Admin page. Fynq Image & Search AI should appear under ‘Installed apps’.
- If the app doesn’t automatically appear. Start typing the name (i.e., Fynq). Once the app’s menu opens in the side panel.
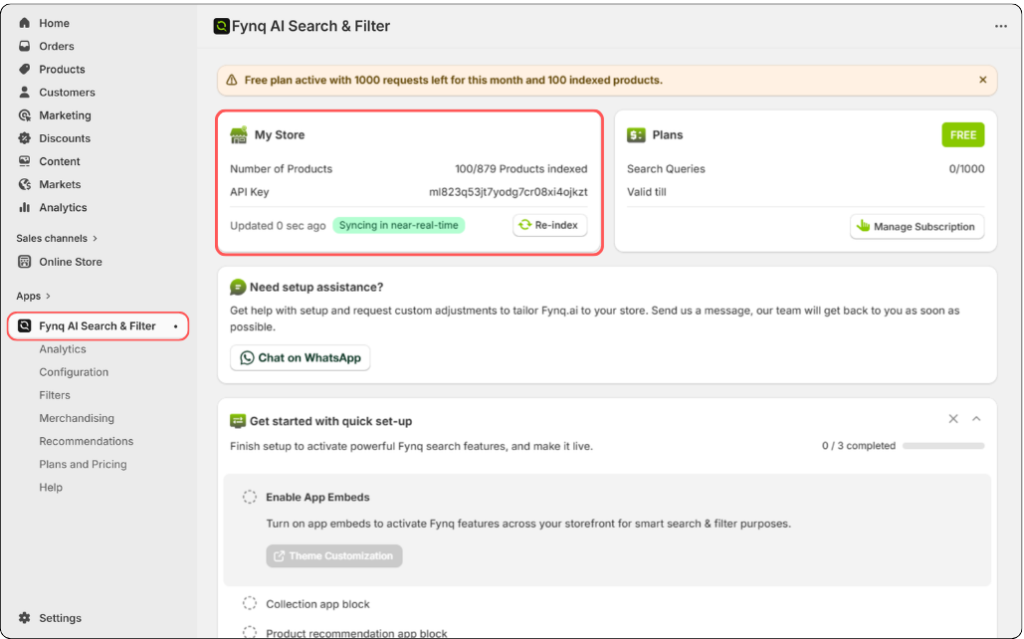
What Happens After Installation?
As soon as Fynq is installed:
- It begins syncing your product catalog (you’ll see a sync indicator at the top of the dashboard).
- You’ll be guided through a Quick Setup section to connect to your search page and activate widgets.
- You’ll also get access to the full Fynq dashboard, where all the features are organized into tabs (Dashboard, Filters, Display Settings, Personalization, Recommendations, and more).
If needed, you can always re-trigger a sync or request help directly from the app.
Final Step: Enable the App Embed to Make It Visible
Installing the app is only the first step. To make Fynq’s search and filters actually show up on your storefront, you’ll need to enable the App Embed Block in your theme settings.
Final Thoughts: Easy to Install, Powerful to Use
Installing Fynq is the first important step in your Shopify journey. Now you are very close to enjoying smarter searches and better product discovery with smart filters. You can do everything yourself without needing a developer. Just a few clicks, and you’ll be ready to go.
If you’re ready to transform how shoppers interact with your products, go ahead and install Fynq now. Real magic begins after this step.